Redimensione imagens sem perda de qualidade
AKVIS Magnifier AI é uma ferramenta eficiente para redimensionar imagens sem perda de qualidade. O software permite ampliar uma imagem para uma resolução super elevada. Seja para criar imagens em tamanho de poster, aumentar a resolução para impressão ou reduzir o tamanho da imagem, AKVIS Magnifier AI tornará as suas imagens nítidas e claras!
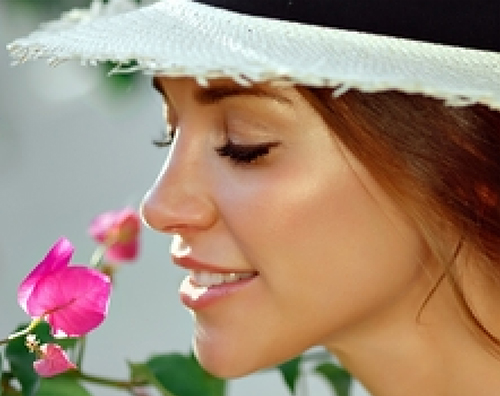
Compare a imagem ampliada a 400% com a original.

AKVIS Magnifier AI está disponível em duas versões: como um programa standalone (autônomo) e como plugin para Adobe Photoshop e Photoshop Elements.
Para ampliar uma imagem deve-se proceder os seguintes passos:
- Passo 1. Abra uma imagem.
- Se estiver utilizando a versão autônoma :
A caixa de diálogo Abrir imagem do arquivo aparece se efetuar um clique duplo em na parte vazia da área de trabalho ou se clicar no botão
 no Painel de controle. Pode-se também arrastar e soltar uma imagem sobre a área de trabalho do programa.
- Se estiver utilizando a versão plugin:
Abra uma imagem no seu editor de imagens utilizando o comando Arquivo → Abrir, ou utilizando a combinação de atalho com as teclas Ctrl+O no Windows, ⌘+O no Mac.
Atenção! Ao contrário de outros plugins de AKVIS (que estão disponíveis no menu Filtro), você vai encontrar o plugin Magnifier AI em recursos de automação de Photoshop.
Certifique-se de que as camadas estão fundidas, caso contrário o plugin não poderá ser chamado.
Selecione em Photoshop: Arquivo → Automatizar → AKVIS Magnifier AI; File → Automation tools → AKVIS Magnifier AI (para Adobe Photoshop Elements).

Ambiente de trabalho do AKVIS Magnifier AI - Passo 2. Antes de redimensionar a imagem, na versão autônoma, você pode usar a ferramenta Recortar
 para cortar partes indesejadas. É útil para melhorar a composição da imagem, corrigir uma foto torta, transformar uma imagem horizontal para vertical e vice-versa.
Note-se que esta ferramenta é aplicada à imagem original! Primeiro use a ferramenta, em seguida, redimensione a imagem.
Você pode alterar a área de recortar arrastando os lados e os ângulos do quadro retangular. Use os botões no Painel de ajustes para controlar a ferramenta. Para aplicar o resultado e remover as áreas ao redor do quadro, pressione o botão OK ou use a tecla Enter. Para cancelar uma operação, pressione Cancelar ou utilize a tecla Esc. Para restaurar a área original mantendo a ferramenta ativa, clique no Reiniciar.

Recortar imagem - Passo 3. Você pode escolher uma das predefinições integradas ou definir a mudança de tamanho necessária (Novo tamanho) nos campos Largura e Altura (em pixels, por cento, cm, mm ou polegadas). Você pode ampliar uma imagem até 800%.
Ajuste a Resolução. Se for imprimir a imagem, é recomendado usar 300 dpi, para web - 72 dpi.

Ajuste do tamanho da imagem - Passo 4. Dependendo do valor Novo tamanho diferentes parâmetros adicionais estarão ativos: Aumentar o tamanho ou Reduzir o tamanho.
Aumentar o tamanho
Para o aprimoramento da imagem o programa usa tecnologias inovadoras de inteligência artificial e aprendizado de máquina.
Selecione um algoritmo de redimensionamento de imagens dependendo do modelo AI:
Standard. Permite ampliar fotos, preservando detalhes e texturas e aprimorando o contraste. Recomenda-se processar fotos de boa qualidade sem ruído perceptível e artefatos de compressão.
Universal. Amplia as imagens, melhorando os detalhes e preservando as margens, além de remover ruídos. Oferece melhor qualidade do que o modo Standard e resultados mais naturais para fotografias do que o modo Intensificado, mas é mais lento.
Intensificado. Permite ampliar imagens proporcionando remoção de ruídos e compressão de defeitos, enfatizando bordas em uma imagem. Funciona muito bem para ilustrações, obras de arte, imagens com texto, imagens de baixa resolução da Internet e para preparar impressões supergrandes.

Standard/Universal/IntensificadoEm casos diferentes métodos diferentes funcionam melhor. A escolha de uma rede neural depende da qualidade da imagem original, bem como do resultado desejado. Comparar modos.
Além do trabalho da rede neural, você pode ajustar um parâmetro auxiliar:
Alisar (0-25). Alisamiento preliminar de irregularidades da imagem. Higher values cause blurring.

Alisar = 0
Alisar = 20Reduzir o tamanho
Ajuste os parâmetros:
Nitidez (0-100). O parámetro aumenta a nitidez de uma imagem intensificando o contraste de cor entre os píxeles vizinhos. Quanto maior seja o valor do parámetro, mais nítida é a imagem.

Nitidez = 0
Nitidez = 80Remoção de ruído (0-25). O parâmetro permite remover ruído e defeitos, aumentando o nível de suavidade. Quanto maior o valor, mais suave é o resultado.

Remoção de ruído = 0
Remoção de ruído = 25 - Passo 5. Clique no botão
 para processar a imagem com os ajustes seleccionados.
Para poder ver o resultado das mudanças dos parâmetros de uma só vez recomenda-se ativar o modo Execução automática ativando esa opção no menu Opções. A imagem será ajustada para 100%. Quando esse modo está ativado qualquer mudança nos ajustes ou navegação na imagem iniciará automaticamente o processamento da imagem.
O botão Cancelar na barra de progresso interrompe o processamento.
Atenção! A processamento de ampliação da imagem é um processo intensivo, e requer uma capacidade de memória RAM disponível substancial e entre 2-3 Gb de espaço livre no disco C:\ para arquivos temporários. Ampliando uma imagem entre 5 a 10 megapixels em 400% a área da imagem aumenta 16 vezes + 200-300 Mb; nesse caso o processamento consumirá aproximadamente 1,5 Gb RAM.
- Passo 6. É possível salvar a seleção de ajustes feita para uso posterior. Para salvar um conjunto de ajustes como Preset (ajustes predefinidos) atribua-lhes um nome no campo Presets e clique o botão Save.
Os ajustes do Preset selecionado serão usados como padrão (default). Se mudar os valores dos parâmetros pode sempre retornar ao padrão salvo clicando no botão Reiniciar. Para processar uma imagem com os ajustes de um determinado Preset, basta selecioná-lo no menu e pressionar o botão
. Para excluir um Preset salvo, selecione-o na lista e tecle Apagar.

Presets - Passo 7. Na versão autônoma você também pode imprimir sua pintura com
 .
.
- Passo 8. Salve a imagem processada.
- Na versão autônoma:
Clique o botão
 para abrir o diálogo Salvar como. Entre um nome para o arquivo, selecione o formato (TIFF, BMP, JPEG, WEBP ou PNG) e indique a pasta de destino.
- Na versão plugin:
Pressione o botão
 para aplicar os resultados e fechar a janela do plugin. O AKVIS Magnifier AI será fechado e a imagem resultante aparecerá na área de trabalho do editor de imagens.
Acione o diálogo Salvar como usando o comando do menu Archivo → Salvar como, entre um nome para o arquivo, selecione o formato da imagem e indique a pasta de destino.
Abaixo pode vier o resultado do escalonamento da imagem apresentada anteriormente.

Fragmento da imagem ampliada em 3 vezes
Magnifier AI v. 13.0 - Teste gratuito 10 dias
